Case study 2
Property type: Terraced house Location: Kensington and Chelsea
Number of bedrooms: 4 Type of service: Partial renovation
Investment budget: £250,000 Style: Eclectic
Team of specialists/contractors: Interior Designer, Building company
The client requested a new bright, cosy and welcoming interior, preserving as much of their existing furnishings as possible. The client wanted Krikla to incorporate the existing furniture into the new concept and find the right place for the artwork that the client owned. Construction works included changing the layout of three floors by moving non structural walls, extending the bedroom and living room, as well as creating an extra bathroom.
Stage 1. Client brief
For this project the client desired a bright home for both family life and social gathering with friends. The personal style aspects were crucial for the future design development, yet they wished to keep the cost of the refurbishment at the lower end.
As the client wanted to retain the existing finishes, this was possible.
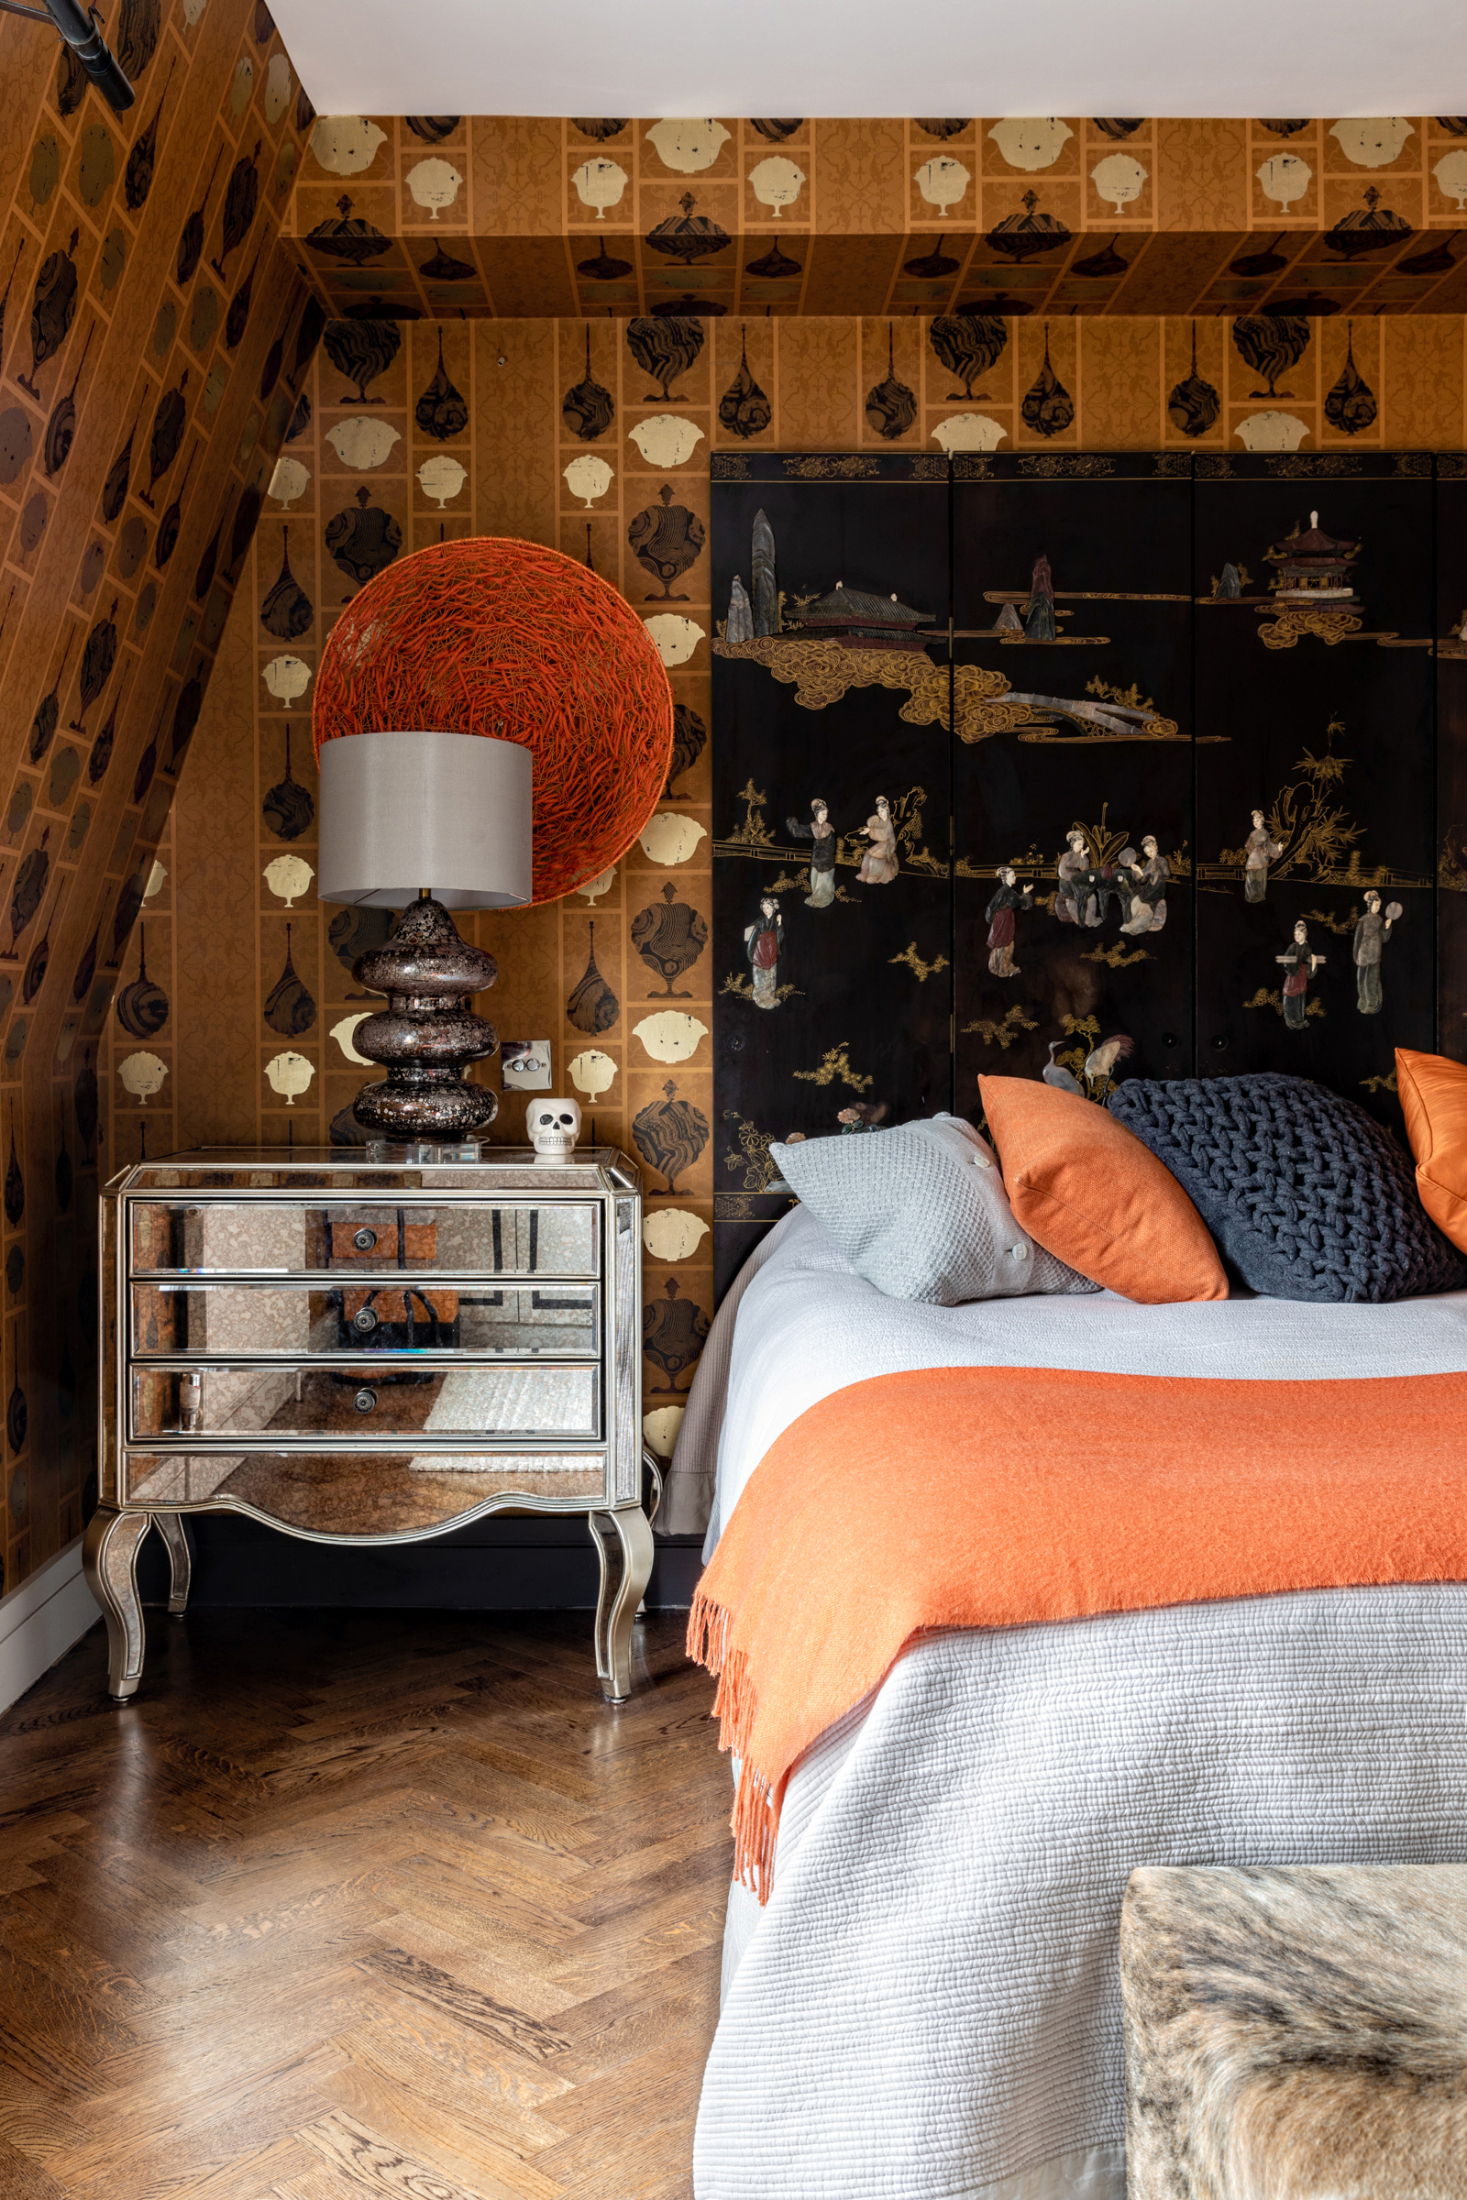
The color scheme was determined by the predominant black colour in their previous interior. Therefore, the decision to work with bright colour contrasts came immediately. The existing furniture was a mix from different homes with a wealth of history behind them, and the client wanted to use all of them. In terms of space layout the client asked to extend the top floor bedroom using ¼ of the space of ensuite bathroom. Removing a wall and separating the hall from the living room on the ground floor. The project also created a guest shower room in the lower ground floor.
Stage 2. Concept design and space planning
We offered just one style concept as we worked with so many ingredients and had to find the logical connectives, rather than to just fill the space. The style concept was based on the strong colour contrast where the charcoal colour was present in some form in almost every room so the other bright colours complement it.
The main decorative tool we used in the house, which transformed the space dramatically, was the paint using brands, Farrow and Ball and Little Green shades). The existing fitted furniture veneered surface didn’t go with a new bright and playful concept, with a help of paint, we transformed the wardrobes into accent elements. We introduced a new furniture layout for every room according to the room purpose.
Stage 1. Technical Design
We created a reduced pack of project documentation
- 2D plans: furniture layout, lighting layout, electrical layout, heating layout, floor finish layout, fitted furniture layout, sanitary ware layout.
- Specifications and technical sheets for sanitary ware and bathroom fittings.
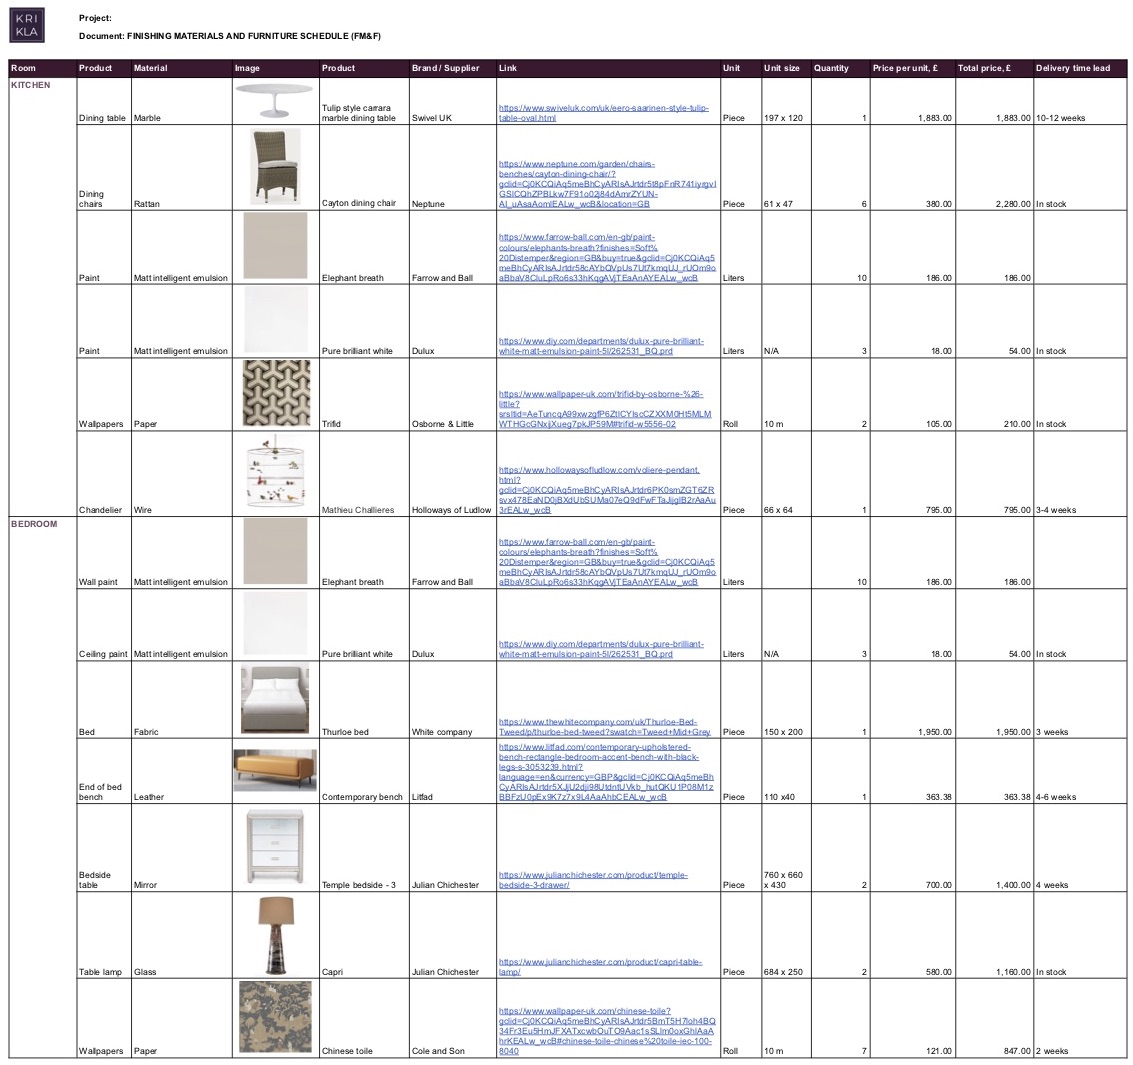
- Schedules (specification spreadsheets): heating, wall/ceiling/floor finish, sanitary ware, sockets and switches, fitted furniture
Stage 1. Budgeting
The budget calculation is an extension of Schedules (specification spreadsheet). Based on the volume or number required we calculated the cost of each materials and furniture and the total investment. Every budget requires two-three revision before the Total looks satisfying and our clients weren’t an exception.
STAGE 5 AND 6. PROCUREMENT AND PROJECT COORDINATION
We worked closely with a Building Team to coordinate the delivery schedule, ordered the materials and tracked the deliveries and prepared monthly expenses reports. With a client we agreed to visit the site once a week (two in case of emergency) to monitor the progress and provide builders with explanations on any questions and solutions for any issues arose during the construction process. We organised the furniture storage for the client and moving service when the property was completed.